But... it didn't start out so lovely.
| See what I mean? |
I began by cutting the bottom off and detaching and cutting the sleeves.
I then put the top inside out on my dress form and sized it up.
Next, I trimmed the armholes so they were level with my shoulders.
Once this was complete, I started to work on the peplum. I turned the bottom section inside out and put it over the top (right sides together).
I pinned the side seams and the middle of the top and pelum together.
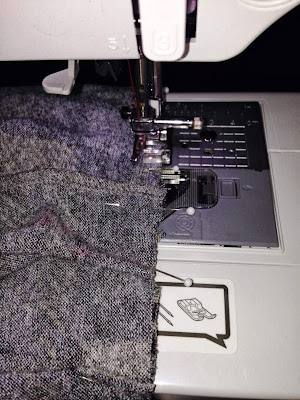
In order to keep everything lined up, I pleated the front first, starting from the middle and working my way to the sides. Then I used these pleats as a guide to pleat the back.
I probably shouldn't do this, but I usually just stitch right over the pins. In this case, it seemed to make sense so that all the pieces would stay in tact.
I wasn't quite sure what to do with the sleeves, so I attached the top of the sleeve to the top of the armhole (from the outside). I then pinned the sleeve around the armhole. I did this to measure exactly where the sleeve should be trimmed. Where the bottom of the armhole and the sleeve met, I pinned it. I removed all of the other pins. *I hope this isn't too confusing.
I laid the sleeves out, folded over. I measured around my wrists and drew a line across the bottom of the sleeve. I then connected the underarm measurement to the wrist measurement with my tailor's chalk.
 |
| See the white chalk marks? |
And then... I stitched them up.
 | |
| Sleeves! |
This was an easy refashion, and I love how it turned out - Frumpy to Fabulous!
***********************************************************************************
On a side note...
There's still time to win this adorable clutch and coffee cozy.
All you have to do is visit my Facebook page, like the post about the giveaway, and share it with your friends. A winner will be drawn and announced on Friday, November 22.


I actually like this peplum, and can see myself wearing it. =D
ReplyDeleteThat's a great compliment, Magda. Thanks 😊
DeleteSUCH an improvement over the original! Great job!
ReplyDeleteI agree, Carissa! It was in pretty bad shape. Even my sister didn't think I could transform it.
DeleteI love it! You make it look so easy.
ReplyDeleteThanks, Sister! You were skeptical when I bought it.
Deletelooks good on you and love how it turned out. Your Mom
ReplyDeleteThanks, Mom : )
DeleteYou really are very talented!!! - Shannon
ReplyDeleteWow! Your comment made my day, Shannon!
DeleteThis comment has been removed by a blog administrator.
ReplyDeleteHi Nout. I'm not sure why your comment was deleted, but I very much appreciate hearing feedback from you. I'm also excited to read future posts on your blog. : )
DeleteGreat job! I love the plaid. It looks great on you. :) I sew over my pins too-- it makes life SO much easier when sewing down pleats, gathers etc.!
ReplyDeleteThanks, Des. I'm glad to hear I'm not the only one who sews over pins. I teach a sewing class to fifth graders, and I tell them to always take them out. I may tell them to keep them in this year. It may keep them from getting their fingers to close to the needles. It takes a lot of coordination to sew and pull out pins.
DeleteGreat job Trisha! I have to say that the "before" shirt was one of the saddest shirts I have seen. But you had great vision and turned it into something fabulous! It looks great and, as an added bonus, looks so comfortable to wear!
ReplyDeleteVery true, Susan. I debated whether or not I should post it with my face showing, but I guess it makes for a drastic transformation. When I picked this top up, my sister looked at me like I was crazy. It is super comfy, and I love it that it was so easy to make. I really appreciate your comments!
DeleteSweet! love it!
ReplyDeleteThanks for your sweet comment!
Delete