Showing posts with label Refashioning.. Show all posts

Sunday, September 22, 2013

Refashion Runway Plaid Refashion Details

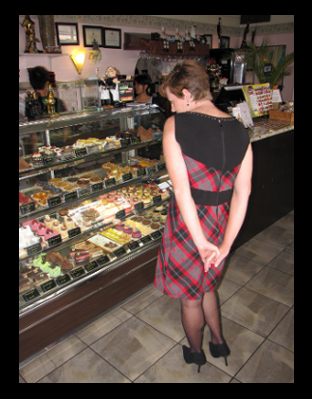
I had so much fun creating this week's plaid refashion.  It was a perfect way to kick off the Fall season, and I'm really happy with the way it turned out.

This is not to say that I didn't stumble upon some challenges along the way. I had originally planned to make the plaid skirt into a strapless dress.  A few weeks earlier I had cut up another strapless dress that was too small.  I used the top of this dress to cut a pattern out of the bottom of the skirt.  I tried several different styles, and in the end it didn't quite work out as I had imagined.

Just when I was about to revamp the whole idea, I remembered that I had a black skirt.  This black skirt had already been through a transformation.  I had made it into a pencil skirt that ended up being way too tight.  I actually wore it to work and walked around in little half-steps all day.  It was quite comical, but very uncomfortable.

Anyway....  I took off the zipper and cut the top off of the black skirt. I then fashioned a halter top of sorts over my dress form.  Using the piece that I had already cut for the plaid strapless dress, I created a color block top by attaching it to the black halter top.  I then cut the zipper out and shaped up the top of the skirt (to use for the bottom of the dress).  There was a strip of the black skirt left, so I connected the top and bottom of the dress with it, creating a color block middle.  Once this was done, I  added a zipper down the back.

When it was completed, the dress looked good, but it was missing something.  My sister suggested that I add some metal studding around the top.  This week's challenge wasn't easy, but I am so pleased with my new Fall dress.  Here's a few photos that show the process.


These photos were taken at a little French Bistro by my gracious husband.  I think he did a fabulous job.  The funnest part was having my son came along, and he loved being a part of it all!


Saturday, September 14, 2013

80's Top to Floral Peplum Refashion

When I first saw this shirt at a garage sale for a dollar I was immediately brought back to the 80's - mall bangs, french rolled jeans, jellies. 


I admit this top isn't all that bad.  Minus the shoulder pads, it's actually kind of cute.  But...  I had other plans for it.  Because the bottom was already gathered, I could see that it would be an easy sleeveless peplum top refashion.  I began by getting rid of those outdated shoulder pads.  I'm starting to get quite a collection, and I need to think of a way to reuse the.  Any ideas?


Once I freed the shirt of its pads, I cut the sleeve off of one side. In order to make both sides even, I folded the top in half and used this sleeve to cut the sleeve on the opposite side. 


And I ended up with mostly even cuts on both sides.


I wasn't too keen on the buttons down the front, so I put the top backwards on my dress form.


As for the collar, I just eyed it and cut a curved neckline. Next, I sized and pinned up the sides for a nice snug fit.  I noticed some bulge around the breast area so I pinned in some darts on each side.


 After the sides and darts were stitched up, I stitched a hem for the collar and sleeves.  In less than an hour I had a cute and stylish floral peplum top. It was a perfect top for a Friday sunset on the beach.


Back view.


Thursday, September 12, 2013

Frumpy Top Refashion

Talk about frumpy!  I found this piece at a garage sale down the street for $2, and although I loved the black and white print, it was way too frumpy. 

Dotty looking frumpy.
 
I guessed that it would be an easy fix, so I put it on Dotty (inside out), and began to size it up.  

Lots of excess baggage here.

Once the shirt was sized up, I took it off Dotty and cut the sleeves off at about three quarters length.  


I then pinned the excess material on the sleeves to match with rest of the top.


After stitching up the sides, I cut off the excess material and sewed a double hem around the sleeves.  In no time, I had a super cute, frumpless top.


Wednesday, September 11, 2013

Man's Dress Shirt to Adorable Top

I found this  Michael Kors man's dress shirt, a gem, at a neighborhood wide garage sale for $2.  Needless to say, I was in heaven.  I loved the print, but it was a bit baggy for me.


I had a vision for this shirt right from the beginning.  My plan was to turn it around backwards.

Terrible photo, but it's backwards.
 I then cut the top of, right below the back panel.  


There was just enough room left in the sleeve area to make new sleeves.  So I sewed up the top, right sides together, and put it on Dotty to fashion a new collar line and size it up.


Next, I tacked the pleats down, folded the collar line over and stitched it up.  The back had a small slit at the top, so I added a snap to keep it shut.  I stitched around the sleeve holes, and presto!  New adorable top!


Sunday, September 8, 2013

Date Night Dress Refashion

It isn't very often that I get to go out for a night on the town with my husband.  So, when the opportunity arose last night, I knew just what I wanted to wear.  This Japanese style print and design caught my eye at a garage sale a few weeks ago.  Aside from being only a dollar, the best part about this dress is that it was made right here in Honolulu.

Frumpy dress.


Of course, I couldn't wear the dress in its current condition, as I looked quite frumpy.  I began by getting rid of the length.  


You can't really see them here, but on the sides, there are slits, and over the slits are Japanese style knots.  My intentions were to keep them, but by the time I got them off, I was running out of time.


Side slit knot.

In the end, I sewed up the slit and made an even hem all the way around.  I then put the dress wrong side out on Dotty and began fitting it to size.


Fitted and pinned to Dotty.

When resizing sleeves, I usually make a single stitch from the edge of the sleeve all the way to the bottom of the dress or shirt.  Perhaps a better seamstress would detach the sleeves, resize them, and then sew them back on.  In this case, my single stitch worked.  


Sized and pinned from sleeve all the way down the dress.

The dress already had a zipper in the back, so once it was stitched up and the sides and hem were done, I cut the excess off with pinking shears (to keep it from fraying).  Viola!  I had a new gorgeous dress for my date.

I loved the way it turned out, and I even got a few compliments.


The Hubby and me.


Saturday, September 7, 2013

Thai Fishing Pants Turned Strapless Dress

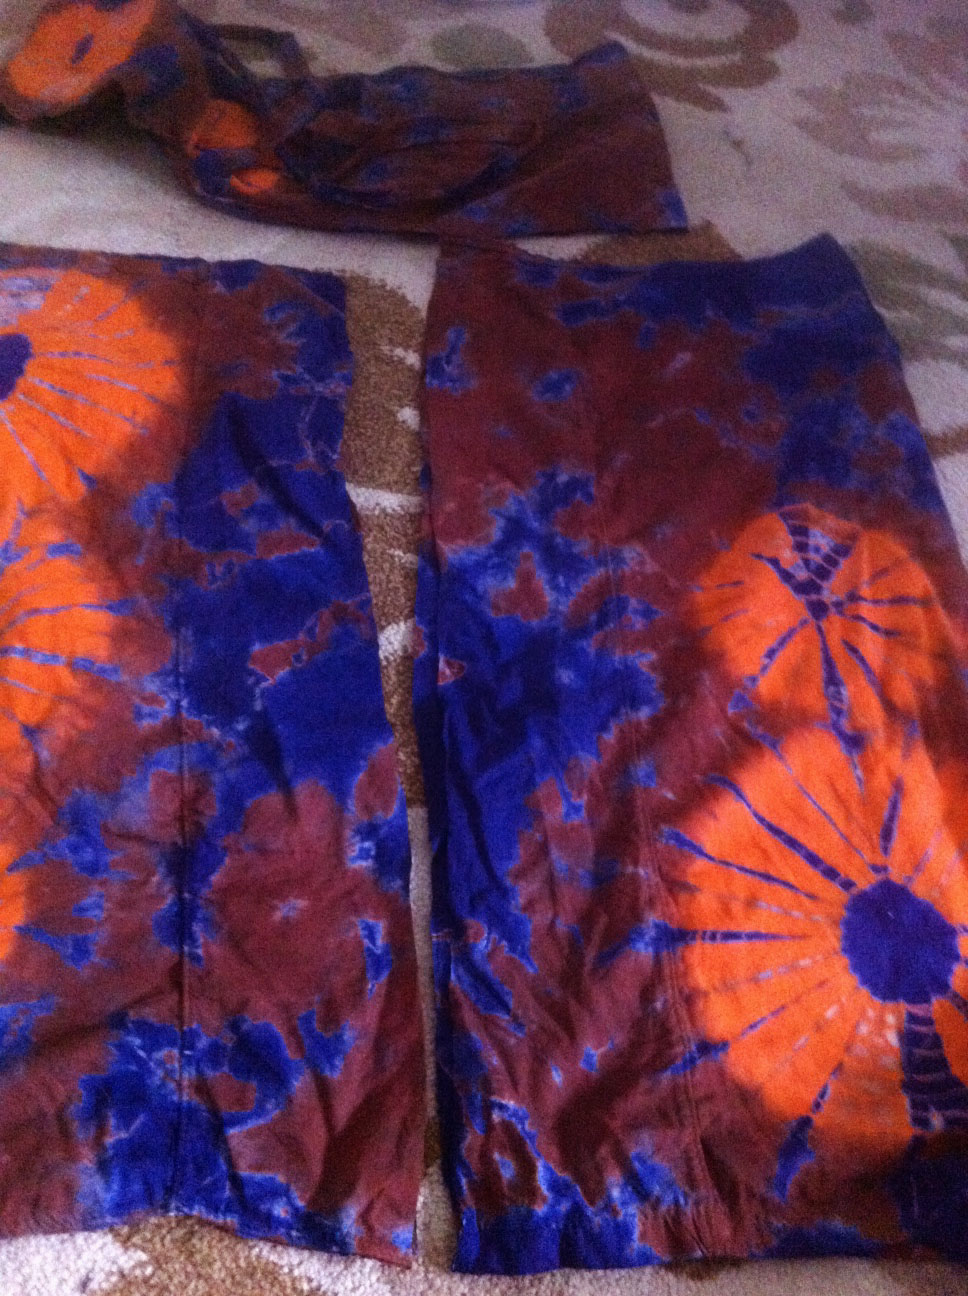
I love garage sales!  Who doesn't?  Goodwill is great for finding crazy discounted designer pieces, but garage sales are definitely the way to go when it comes to refashioning.  Usually, I don't like to pay over a few dollars for a piece I plan to refashion.  In fact, the less I pay, the more risks I feel I can take.  This is exactly what happened with these Thai Fishing pants that I got for less than a dollar at a garage sale a few weekends ago. 


Super funky print.

I really loved the funky print of these pants, but I really do not like Thai fishing pants.  During my travels to Thailand, I bought a few pairs, thinking that I would wear them all the time.  I do wear them to bed, but that's about all.  I'm not a fan of how they make my butt look like a big bubble.  So, I cut these up right away.  

First, I cut the top off.


Yes, terrible photo, but you can see that the top is cut of.


Usually, Thai fishing pants have a tie that wraps around the top to hold it on your waist; kind of like a paper sack.  I used the seam ripper to take this skinny tie off the back.

As for the bottoms, I cut them strait down the middle, so that I had a cut straight edge on each pant leg.


Each pant leg is cut straight.

After cutting, I sewed the top layer of the bottom pieces together, and then put the separate bottom and top pieces, wrong side out, on Dotty (my dress from).  I could see in the front that there were places that were sticking out near the breast area.  This let me know that I needed to add darts so that it would fit nicely.


The odd thing hanging off the side is a random little pocket.


I then sewed up the darts and then sewed the cut top to the bottom (right sides together).  I put the piece back on Dotty, wrong side out, and began pinning it to size in the back and sides. 

Back and sides pinned.

The sides and about 3/4 of the back were sewed up.  I added a zipper at the top and used the skinny tie that I had detached earlier as a belt.  Within a few hours, I had a very cool and funky strapless dress.