Sadly, Spring Break has come to an end. I had a lovely time hanging out with my little buddy. We were able to catch some amazing sunrises.
Surprisingly, I was able to find some time to refashion. It felt really good to complete a few projects that have been lingering for a while. One of which is a silk plaid top remake. I found this silk top at a Goodwill in Cincinnati over Winter break for $2. I just couldn't get over the funky plaid print.
But... as you can see, it was a little outdated for my taste. In truth, I wasn't sure I would be able to update this number. Not really knowing where to start, I removed the enormous shoulder pads and seam ripped the sleeves and collar.
.jpg) |
| How convenient. Snap on for high shoulders. |
Unfortunately, I can't find the photos for the next few steps. I wanted to try something new, so I seam ripped the shoulders apart and gathered the front side. I then stitched the fronts back onto the backs that had already been fitted to my shoulder size.
Next, I sewed up the front of the top, creating a v-neck.
 |
| This was my second time to sew up the front. When the top was complete, I noticed that the stripes didn't match up and decided to redo the seam. |
I then sized up the sides by taking them in about a half inch or so. At first, I thought that I could keep the slits at the bottom of the shirt, but in the end, I had to stitch them up in order for the top to fit.
Once the new armholes were made, I resized the sleeves.
.jpg) |
| Removed cuffs and cut sleeves three quarter length. |
.jpg) |
| Cut the sleeves down the middle. |
.jpg) |
| Pinned the sleeves around the armhole in order to mark where to cut. |
.jpg) |
| Resized the sleeves. |
I have found this process fairly easy for resizing sleeves. Again, there are no photos, but once the sleeves were resized, I sewed up the seam and stitched them onto the armholes. I then sewed a double hem at the end of the sleeves.
To add some detail to the sleeves, I created button sleeve straps from the old sleeve cuffs. You can find a more detailed tutorial of the sleeve straps
here.
 |
| Sized up to make long rectangles. |
 |
| Long rectangles. |
 |
| Turn inside out and sew along three edges, leaving the bottom edge open. |
 |
| Turned inside out and sewed a button hold on the end. Turned the other end in and stitched it across. |
 |
| Stitched a box around the non-button hole end of strap to inside the middle of sleeve. |
For the neckline, I decided to use bias tape. Firstly, I made a diagonal edge by sewing two edges of the bias tape together at a diagonal.
To attach, I sewed the top edge of the bias tape onto the top edge of the neckline, right sides facing. I used the crease as a guide.
.jpg) |
| I overlapped the edges. |
.jpg) |
| I sewed onto the top crease. |
.jpg) |
| At the "V", I left the needle in and lifted the foot to move the tape along the path. |
After sewing the top of the bias tape to the neckline, I flipped the tape over to the inside of the shirt, ironed it down and then pinned and stitched it.
.jpg) |
| Ironed down. |
 |
| Pinned. |
 |
| Pinned back. |
 |
| Sew along outer edge. |
Although the making of this top was a fairly long process, the outcome was totally worth it.

.jpg)
.jpg)
.jpg)
.jpg)
.jpg)


.jpg)
.jpg)
.jpg)

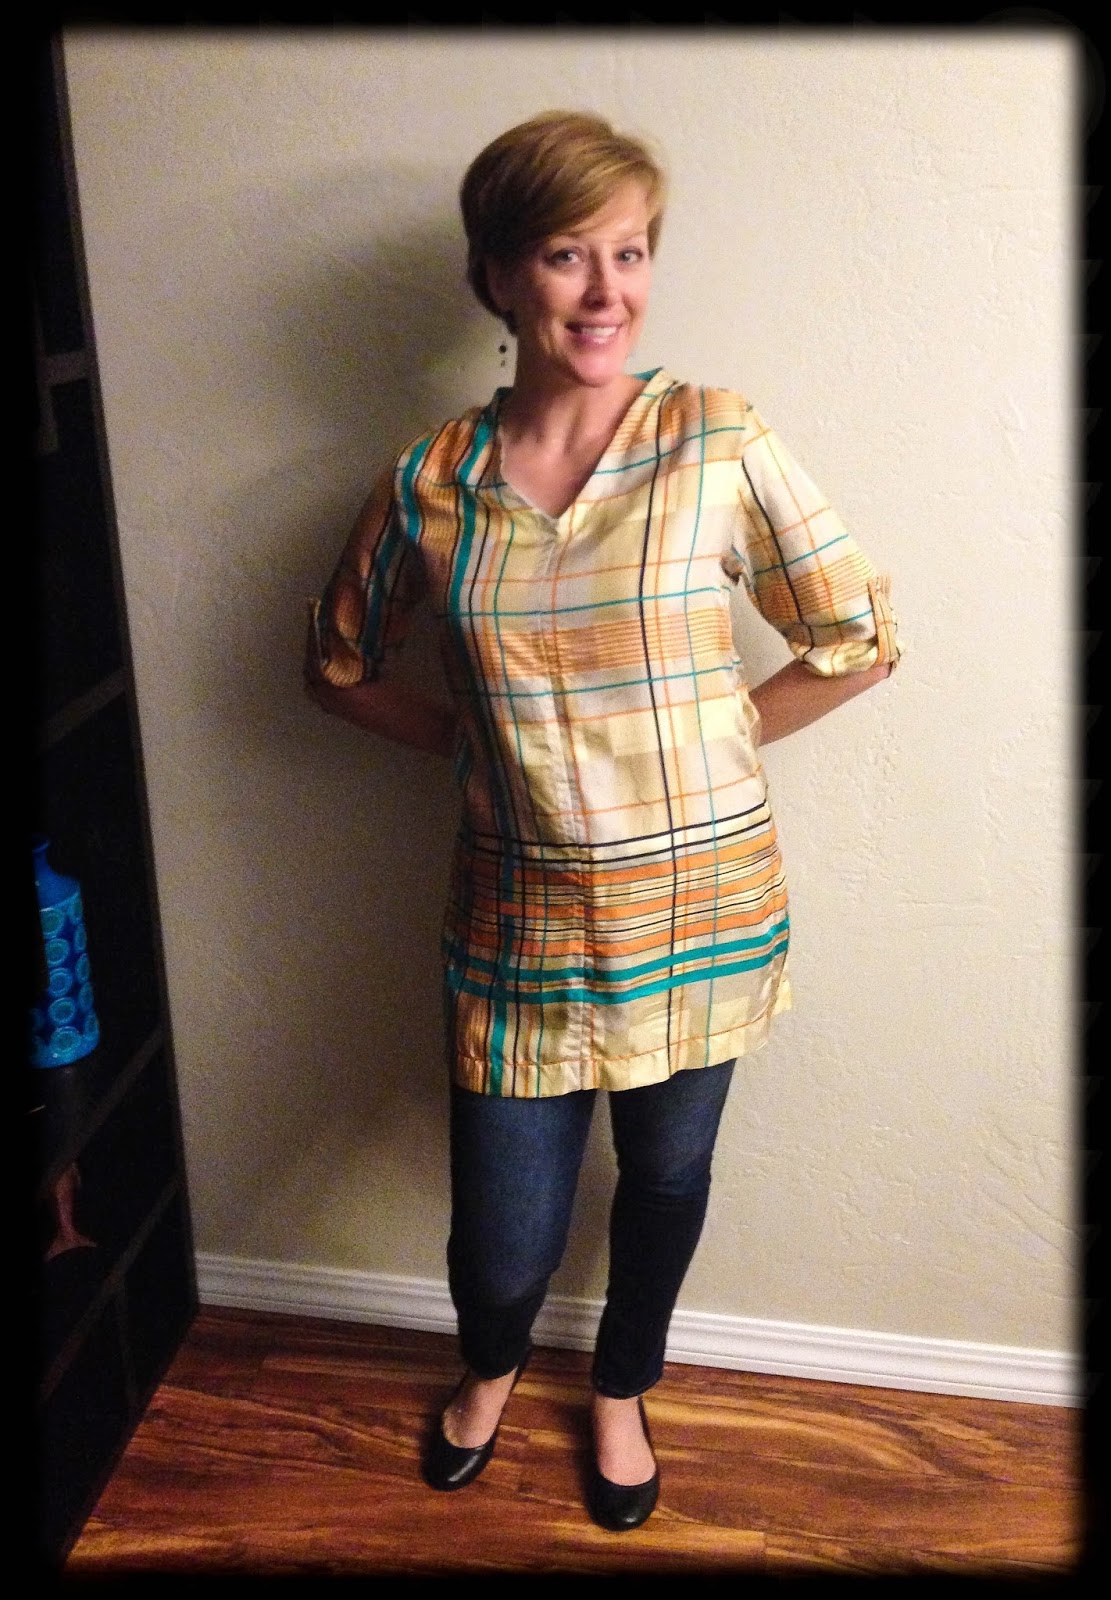


Plaid! Silk! And those colors! Yes, totally worth saving. :o)
ReplyDeletewww.dressupnotdown.blogspot.com
I agree! I was shopping with my mother-in-law at the time, and I think she thought I was crazy for picking this out. I was sold on the colors and silk. Thanks for your comment. : )
DeleteNice job ! I love it !
ReplyDeleteThank you, Liochka!
DeleteLooks great and much more stylish!
ReplyDeleteYes, I agree, Marie. It was questionable whether or not I could salvage it. I was surprised that it turned out okay.
DeleteSo cool! love it
ReplyDeleteThank you! It's definitely a unique color scheme.
DeleteToo cute!
ReplyDeleteThanks for your comment and for stopping by!
DeleteWhat gorgeous pictures!
ReplyDeleteThe colours in that plaid are so vibrant - your changes to the top really brought out their beauty.
I so much appreciate your comments, Jenny! Thank you. I was worried that this top wasn't going to work out because silk is so hard to work with.
DeleteReally cute refashion!
ReplyDeleteYou've got some serious sewing skills, sister! That material isn't easy to sew yet you performed a miracle.
ReplyDeletePS. I've signed up a couple of times to receive your notifications through email and I'm still not getting them. I'm signing up again, because I don't want to miss any of your fun refashions!!! Crossing my fingers and hoping it works this time. :)
Thanks, Beth. If you could only see how many times I had to seam rip the thing. It was tricky to work with.
DeleteI've checked your email, and it's listed as active. My husband said that it took a few weeks or so for him to start receiving my new posts. I'm not sure why there's such a lag time. If you don't start receiving them in a few weeks, let me know. In the meantime, I'm going to try to figure out how to get them out sooner. Thanks for the heads up.